This light and creamy vanilla buttercream recipe, sometimes known as ‘Ermine Frosting’, surprised be the first time I made it. Like most frostings, this one is ultra-smooth, creamy and stable enough to use for layer cakes and piing onto cupcakes. But it’s not overly greasy or buttery like some frostings. This is really tasty! It comes together with a few simple ingredients: flour and sugar are cooked with milk to create a ‘milk paste’ which is then beaten with butter to create the most delicious frosting you’ll ever have. Somewhere between whipped cream and traditional frosting.
Hey team! Boiled Milk frosting? Yeah, that’s right. It sounds old school, but it’s about to be your new favorite frosting! I was skeptical the first time I tried it. I thought, flour in frosting? That’s not going to taste great. Wrong. The flavor is my favorite thing about this frosting! The flour in the recipe is cooked so you can’t taste it but it’s what gives the vanilla something to grab onto which intensifies the flavor. The flavor reminds me a lot of French Pastry Cream which is basically a celebration of vanilla in epic proportions. It’s got a gorgeous vanilla flavor which makes it a perfect paring with my Vanilla Cake.
And it isn’t too sweet! This frosting doesn’t rely on sugar to give it it’s structure. It relies on the milk paste for that which means you don’t need to use a lot to get a nice stiff frosting for your desserts.
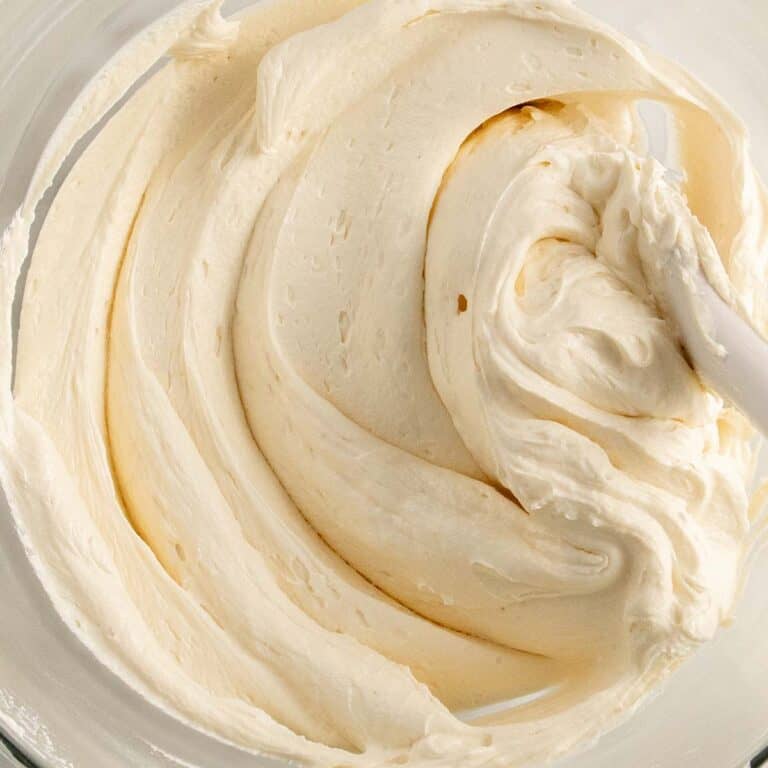
It’ll hold its shape just as well as my Classic Vanilla Frosting (a great all rounder!), but it’s almost as light and airy as my Chantilly cream. It’s somewhere in between there. And it gets it’s smooth texture from the way the sugar is dissolved in the milk paste. When you beat it with the butter you’re just left with a luscious and ultra-smooth frosting which isn’t overly sweet. That smooth texture is great for getting sharp edges on layer cakes or using for your favorite cupcakes.
Like most of my frostings, this one is easy to customize using extracts and food gel colors. But if you’re after another frosting with a fresh, natural flavor, try my Strawberry Buttercream. It uses actual strawberries in it which means you get a boost of fresh strawberry in your dessert. It tastes amazing on chocolate cupcakes. The chocolate doesn’t overpower it because the strawberry flavor is so intense.
Why This Will Be Your New Go To Frosting
I think once you try this frosting you’ll see why it stands out. Here’s what I think you’ll love about it:
- The taste will shock you – to me, it tastes a lot like a rich custard. It’s creamy and the vanilla flavor is out of this world. My theory is because the flour/sugar/milk paste gives the vanilla extract something to grab onto.
- Perfectly smooth and fluffy – since the sugar is dissolved in the milk paste, there’s no grittiness. You’re left with an ultra-smooth, airy texture that feels light.
- Far-less sweet than other frostings – because it uses less sugar! The sugar isn’t what gives this frosting structure. It’s the milk paste.
- Stupid Smooth – because of that milk paste. The sugar is dissolved in it so there’s no grit. Gives you decent sharp edges on your cake.
It Doesn’t Get Smoother Than This
Unless it’s my Swiss Meringue buttercream frosting haha. Look, my Classic Vanilla Buttercream is smooth and fluffy, but because of the way the icing sugar is incorporated into the butter, there is some grit. This on the other hand? No grit, completely smooth.
Ingredients
Fluffy Ermine Frosting
- ▢ 150 g granulated sugar
- ▢ 40 g all-purpose flour
- ▢ 250 g whole-fat milk
- ▢ 300 g unsalted butter, softened (see notes)
- ▢ 14 g vanilla extract or vanilla bean paste
- ▢ 1/4 tsp fine salt
Instructions
Fluffy Vanilla Frosting
- Make milk paste – Add the sugar and flour into a medium sized saucepan (non-stick or stainless steel). Mix until well combined. Add the milk and stir until everything is well combined. Place on medium heat and stir using a silicone spatula (if using a non-stick pot) or the same whisk (if using stainless steel). After about 3 minutes of continuous stirring, the mixture will begin to thicken and then become a pudding like texture. Once the pudding begins to boil, take off the heat, transfer to a bowl and cover with plastic wrap. Allow to cool completely to room temperature.
- Whip butter – For this recipe, you’ll need to make sure the butter is softened. I’ve left instructions in the notes on how to do that. Add the butter to a large mixing bowl and use an electric hand mixer to whip on high speed until it lightens in color and becomes creamy, about 3-4 minutes.
- Add milk paste – Scrape down the bowl and add 1/4 of the cooled milk paste, vanilla extract and pinch of salt to the whipped butter. Whip on high speed until well combined. Scrape down the bowl and repeat until all the milk paste is in the frosting. Once it’s well combined the frosting is ready to us!
- If the frosting is too stiff – add it to the microwave for 5 seconds, then mix together using a spatula until it’s as soft as you need it.
- To store frosting – Place in an airtight container and store in the fridge for 3 days. Thaw to room temperature before whipping again.
- To freeze frosting – Add to a zip lock bag and seal. Freeze for up to 2 months. Thaw to room temperature and whip again before using.
- To color frosting – use food color gel, not liquid food dye. Mix in until you reach the color you want. A little goes a long way and the color intensifies the next day
Notes
Softened Butter – Make sure your butter is softened for this recipe. It’ll help with the structural integrity of the frosting. I have a full guide on how to properly soften butter on the blog, but for reference, softened butter is 18C / 65F on a thermometer. Cut it into cubes and let it sit at room temperature for 1-2 hours until it reaches this temperature to until it’s soft enough that when you press on it with your finger, it leaves an indent with some resistance.
How much frosting do I need to make?
This recipe is enough to fill and frost a two-layer 20cm / 8-inch Vanilla Cake or 12 cupcakes with high frosting swirls or 24 cupcakes if you’re smearing it on with a spoon or spatula.
Storage – Buttercream can be stored in an airtight container and kept in the fridge for three days. Let it thaw at room temperature before whipping up again to use on cakes and cupcakes.Nutrition – is an approximate and is based on per 1 batch. See above note for how much one batch will work for.A note on measurements – this recipe is offered in weight measurements. This is in an effort to offer the most accurate way to get the best results. Cup measurements simply aren’t accurate enough for a recipe that needs precision and cup sizes differ depending on where you are in the world. Here is where you can learn more about how to measure ingredients using digital kitchen scales!