This 4-ingredient oven baked Mother’s Day dessert is the kind of sweet surprise that feels fancy but is secretly so simple. It starts with solid, unthawed frozen unwrapped ice cream sandwiches layered in an oven-safe baking dish, then gets dressed up with just three everyday items you probably already have on hand.
It’s a cozy, Midwestern-style shortcut dessert that lets you spend less time in the kitchen and more time at the table with your family, while still delivering that “wow” moment when everyone takes the first bite.
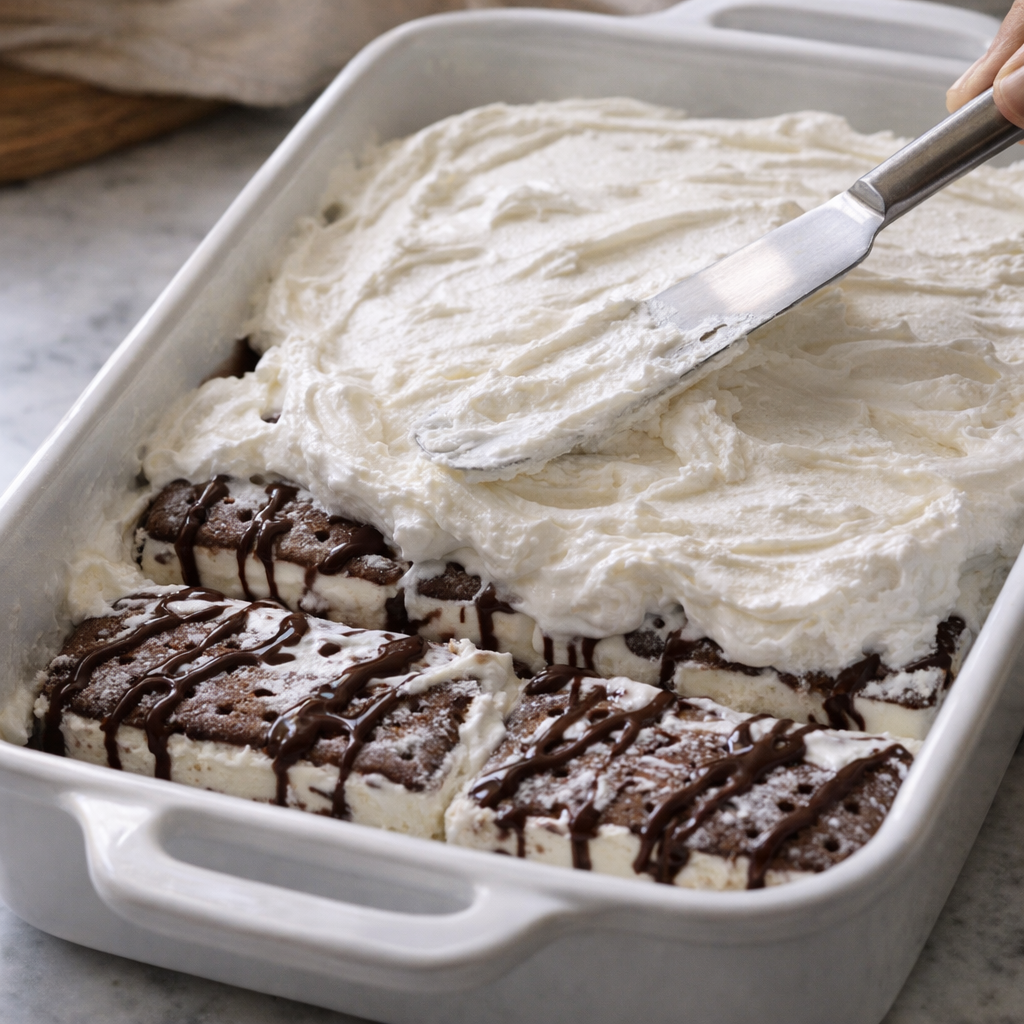
Serve this warm, gooey ice cream sandwich bake straight from the oven with a big spoon, scooping it into bowls so everyone gets a little bit of everything: soft cake-like edges, creamy center, and melty chocolate. A drizzle of extra chocolate syrup or caramel on top makes it feel extra special for Mother’s Day.
Fresh berries (like sliced strawberries or raspberries) on the side help balance the sweetness, and a cup of coffee or a glass of cold milk is perfect for sipping in between bites.
Ingredients (8-10 servings)
• 16-20 chocolate graham crackers (or low-point chocolate wafers/cookies — break them to fit). Each mini “sandwich” is roughly 0.5–1 point.
• 1–2 tubs (8 oz each) Fat-Free Cool Whip (or light whipped topping — very low points).
• Sugar-free chocolate syrup (Hershey’s Zero Sugar or Walden Farms — 0 points).
• Sugar-free chocolate chips or unsweetened cocoa powder (use sparingly for topping).
Optional zero-point add-ins: Fresh strawberries, raspberries, or a sugar-free pudding mix stirred into the Cool Whip for extra flavor.
Instructions
1. Preheat oven to 350°F (175°C). Lightly spray a 9×13 baking dish with cooking spray.
2. Arrange a single layer of chocolate graham crackers on the bottom of the dish (break pieces as needed to cover fully).
3. Spread a thick layer of Fat-Free Cool Whip over the crackers.
4. Drizzle sugar-free chocolate syrup evenly on top (use about half the amount).
5. Place another layer of graham crackers on top to create a sandwich effect.
6. Add a final thin layer of Cool Whip, another light drizzle of syrup, and sprinkle with sugar-free chocolate chips or cocoa powder.
7. Bake for 12–15 minutes until the edges are slightly set and everything is warm (do not fully melt).
8. Let it rest for 5–10 minutes. Serve warm or chilled.
WW Points Estimate (per serving)
• 1/8 to 1/10 of the pan: Approximately 2–4 points (often 2–3 points when using fat-free Cool Whip and minimal chips).
• Exact points depend on your specific brands — always scan ingredients in the WW app for accuracy.
Tips for Lowest Points
• Use Fat-Free Cool Whip and zero-point sugar-free syrup.
• Keep chocolate chips to a minimum or replace with cocoa powder.
• Serve smaller portions with lots of fresh berries on the side (0 points).
• Store leftovers in the fridge for up to 2 days or freeze.
Variations & Tips
For picky eaters, you can use vanilla-only ice cream sandwiches and skip the chocolate syrup on top, or swap the mini chocolate chips for colorful sprinkles. Try different flavors of ice cream sandwiches like chocolate, strawberry, or even cookies-and-cream to mix it up for different holidays.
You can also replace the chocolate syrup with caramel or a mix of both for a richer, sundae-style bake. If your family likes some crunch, sprinkle crushed cookies (like chocolate sandwich cookies or graham crackers) over the whipped topping along with the chocolate chips before baking.
For a slightly lighter version, use light ice cream sandwiches and light whipped topping, and cut back the chocolate chips to 1/2 cup. Food safety tips: Keep the ice cream sandwiches frozen solid until you’re ready to assemble so they don’t melt on the counter. Work quickly when unwrapping and arranging them in the baking dish.
Because this dessert contains dairy that’s been warmed, don’t let it sit out at room temperature for more than 1–2 hours; refrigerate any leftovers promptly, and enjoy them within 1–2 days for the best texture. Reheat leftovers gently in the microwave in short bursts if you like them warm again, but avoid reheating multiple times.